CPR Skills Test: What to Expect and How to Pass It
She's standing in the training room, hands hovering just above the manikin's chest. Her heart is beating faster than she expected. She's run through the steps in her head a dozen times on the drive over — but now the assessor is moving down the line, clipboard in hand, and she can feel her mind starting to blank.
Sound familiar?
Being nervous before a CPR skills test is completely normal. Your assessor is not looking for perfection. What they're marking you on is the right sequence, performed with confidence and intent. That's it.
This article walks you through exactly what happens during a CPR skills test in Australia, so there are no surprises on the day. Whether you're completing your HLTAID009 CPR assessment for the first time or coming back for a renewal, you'll know what the assessor's checklist looks like, what the most common mistakes are, and how to prepare so you walk in ready.
What Is Tested in a CPR Skills Test?
A CPR skills test assesses your ability to perform cardiopulmonary resuscitation correctly and safely on a training manikin under assessor observation.
Here's every element that's assessed:
Hazard identification and scene safety check
Checking for consciousness and calling for help
Positioning the patient correctly
Opening the airway (head-tilt chin-lift)
Checking for normal breathing (no more than 10 seconds)
Calling 000 (or directing a bystander to call)
Delivering 30 chest compressions at the correct rate and depth
Delivering 2 rescue breaths (where applicable)
Continuing CPR cycles until help arrives or the patient recovers
Correct use of an AED if one is available
Every one of those steps follows the DRSABCD action plan as defined by the Australian Resuscitation Council (ARC) — and that framework is the backbone of everything you'll be assessed on.

How Does a CPR Skills Test Work?
If you've never done a CPR assessment before, not knowing what the room looks like can be half the anxiety. So let's walk through it.
What to expect on the day
The training space will have manikins laid out on the floor, with enough room around each one for you to kneel and work. Your trainer works from an assessment checklist, and the whole environment is set up to support you, not trip you up.
This is a supported assessment, not a written exam with a timer. The goal is to confirm you can perform CPR safely and in the correct sequence — not catch you out on technicalities.
Who conducts the assessment?
Your assessment is conducted by a qualified trainer and assessor at Advanced Resuscitation Training, working from a standardized checklist aligned to the HLTAID009 unit of competency. There's no subjectivity in how you're marked. The checklist is the checklist.
One thing worth knowing: the HLTAID009 CPR assessment must be conducted face-to-face. Online-only CPR courses do not satisfy the practical requirement under current ARC guidelines — a fully online certificate won't hold up to a compliance check.
Now let's get into the actual framework your assessor is working from — the DRSABCD action plan.
The DRSABCD Action Plan: Your Test Blueprint
What does DRSABCD stand for?
DRSABCD is the action plan used by the Australian Resuscitation Council as the standard framework for responding to an emergency. Every step in your CPR skills test maps directly to one of these seven letters — and your assessor's checklist follows them in order.
Think of DRSABCD less as an acronym to memorize and more as a script to perform. The order matters. The verbal communication matters. Knowing what the assessor is ticking off at each step is the difference between a confident first attempt and a reset.
Breaking down each step for the assessment
Every one of those assessor checkpoints comes directly from ARC guidelines. Most articles tell you what each letter stands for and stop there. But what actually matters for your CPR assessment is what the assessor is physically watching for at each step — and that's what you need to be practizing.
What Assessors Are Actually Looking For
Sequence over speed
Your assessor is not timing you. They're watching whether you move through the steps in the right order.
Getting the DRSABCD sequence correct matters more than performing each step with clinical precision. A compression depth that's slightly off is far less of a concern than skipping straight to compressions without checking for breathing first. Sequence is everything. Speed is secondary.
Confidence and communication
This is the part most people forget to practize — and it costs them.
Assessors are listening, not just watching. They want to hear you calling out what you're doing as you do it. Announcing the danger check. Directing a specific person to call 000 — not just saying "someone call an ambulance" but pointing and saying "you, in the blue shirt, call 000 now." Counting compressions out loud.
Less than 50% of people who witness a cardiac arrest attempt CPR, and one of the biggest reasons is uncertainty about what to do. Verbal communication during your assessment shows the assessor you're not just going through the motions.
Common mistakes that cost marks
Most resits come down to the same handful of errors. Know these before you walk in.
Starting chest compressions before completing the full DRSABCD sequence
Incorrect hand placement — heel of one hand on the centre of the chest, other hand on top, fingers interlaced and lifted
Compression depth that's too shallow — pressing down without enough bodyweight behind it
Not completing full cycles — stopping mid-sequence rather than continuing until help arrives or the patient recovers
Verbal communication that's too quiet or missing entirely
Next, let's get into the specific numbers you need to have locked in before you arrive.

CPR Compression Rate and Depth: The Numbers You Must Know
Compression rate (beats per minute)
The Australian Resuscitation Council recommends a compression rate of 100 to 120 compressions per minute for adult CPR. Most people either go too slow or, when they're nervous, rush past 120 and lose depth in the process.
If you want a practical way to lock in the right tempo before your course, use the Bee Gees. "Stayin' Alive" sits right at approximately 103 BPM — dead centre of the ARC recommended range. Put it on, count along, and you'll have the rhythm in your body before you ever touch a manikin.
Compression depth (adults vs children)
Rate is only half of it. Depth matters just as much.
For adults, you're pressing down 5 to 6 centimetres — roughly the depth of two stacked $2 coins. Use your bodyweight, not just your arm strength. Lock your elbows, lean over the patient, and drive straight down. Shallow compressions are one of the most common reasons candidates need a resit.
After each compression, allow full chest recoil before the next one. The chest needs to return to its normal position to let the heart refill.
How to practise the right rate before your course
You don't need a manikin to practise compression rate:
Pull up "Stayin' Alive" on Spotify and count compressions on your thigh to the beat
Use a free online metronome set to 110 BPM and practise your count
Watch a short ARC-aligned CPR demonstration video and count along
If you did your CPR training more than a couple of years ago, there's a real chance you're working from outdated figures. ARC Guideline 8 sets the current standard, and a renewal course isn't just a certificate refresh — it's an actual update.
Do You Have to Do Rescue Breaths in a CPR Test?
Yes — and it's worth being clear because there's a lot of confusion online.
Under current Australian Resuscitation Council guidelines, rescue breaths remain part of the HLTAID009 practical assessment for trained rescuers. Compression-only CPR is the recommended approach for untrained bystanders, not for someone holding or working toward a nationally recognised certificate.
If you're sitting a CPR skills test, you're assessed as a trained rescuer. The full 30:2 ratio applies.
What the 30:2 ratio means in practice
Thirty chest compressions, then two rescue breaths. That's one cycle. You continue repeating that cycle until the ambulance arrives, an AED becomes available, the patient shows signs of recovery, or you're physically unable to continue. Your assessor is watching that you complete full cycles correctly without losing compression depth as you move between compressions and breaths.
What about the hygiene side of it?
You will not be making direct mouth contact with the manikin. Face shields and pocket masks are provided at every HLTAID009 session, and using one correctly is itself part of what you're assessed on.
How to Use an AED in Your CPR Assessment
What is an AED and will one be in the room?
An AED — automated external defibrillator — is the device you've probably seen mounted in a bright yellow or green cabinet at shopping centres, gyms, airports, and workplaces. It delivers an electric shock to the heart in cases of certain cardiac rhythms, and it's designed to be used by anyone.
For your HLTAID009 CPR assessment, an AED trainer unit will be in the room as part of the defibrillation step in DRSABCD.
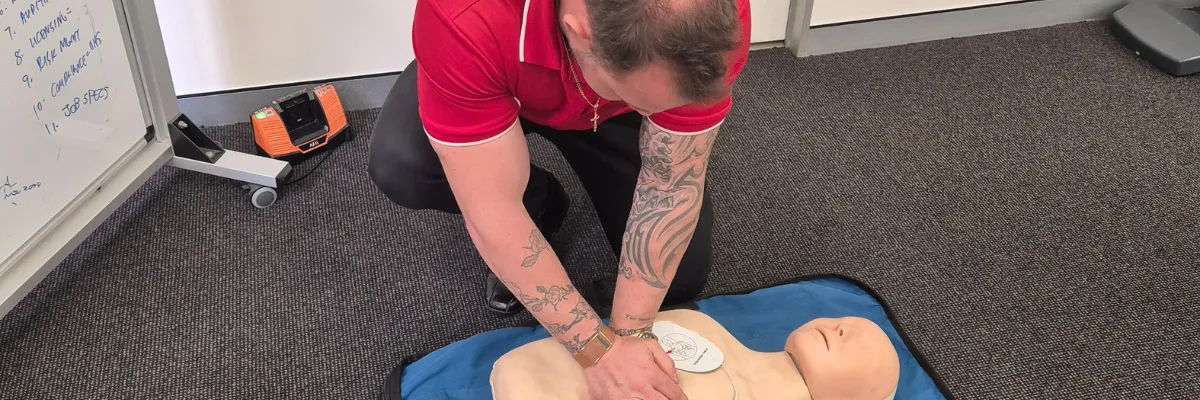
The four AED steps assessed
The assessment checks whether you know to retrieve it, turn it on, and follow its instructions. The device talks you through the rest.
Power on — turn the AED on as soon as it's available, without delay
Attach the pads — place the adhesive pads on the correct positions on the patient's bare chest (one below the right collarbone, one on the left side below the armpit)
Follow the prompts — let the device analyse the heart rhythm and follow its spoken instructions without interrupting
Deliver shock or resume CPR — if a shock is advised, clear bystanders, deliver the shock, and immediately resume CPR; if no shock is advised, continue CPR cycles
How to Prepare for Your CPR Skills Test
Most people spend the days before their course worrying about the assessment. The ones who pass first time spend those same days preparing for it.
The night before: what to review
Don't cram. CPR is a physical skill, and muscle memory comes from doing, not reading. What actually helps:
Review the DRSABCD sequence out loud — say each step in order, slowly. Once through beats reading the acronym twenty times
Watch a short ARC-aligned CPR demonstration video — seeing the full sequence at the correct pace gives your brain a visual to work from the next morning
Don't try to memorize everything — your trainer walks you through the full sequence before the assessment. The night before is about familiarity, not perfection
On the day: what to bring and wear
Wear comfortable clothes — you will be kneeling on the floor
Bring your booking confirmation and photo ID — your RTO needs to verify your identity before issuing a nationally recognized certificate
Arrive a few minutes early — walking in with time to settle makes a real difference to how calm you feel when the assessment starts
The one thing most people forget to practise
It's not compression depth. It's not hand placement. It's verbal communication.
Most people practise CPR silently — running through the steps in their head, imagining the sequence. But assessors are listening. They want to hear you announce the danger check, direct a specific person to call 000, count compressions out loud.
Practising in silence means you'll perform in silence — and silence on assessment day costs marks.
The difference wasn't time — it was that she said it out loud.

What Happens If You Don't Pass?
Resits are normal. They're not embarrassing, and they don't mean you're not capable of learning CPR. They mean one specific part of the assessment sequence needs to be repeated.
If you don't pass a component of your CPR skills test on the first attempt, your assessor tells you exactly which step or steps need to be redone. No guessing, no vague feedback. You're not starting from scratch — you're repeating the one thing that needs more practice.
At Advanced Resuscitation Training, resit options are available so you're not left in limbo. Your assessor will talk you through what's needed before you leave the room.
If you know the worst case scenario is a resit on a clearly identified step, the fear of walking in and failing dissolves into something manageable. You're learning a physical skill, in a supported environment, with a trainer who wants you to get there.
Ready to Book Your CPR Skills Test?
Walking into a CPR skills test prepared is a completely different experience to walking in and hoping for the best. You now know the DRSABCD sequence your assessor is working from, the compression numbers that matter, what they're listening for, and the one practice habit that separates students who pass first time from those who need a resit. That's more preparation than most people arrive with.
The practical component is hands-on and supported — your trainer is there to guide you through it, not catch you out. And if you don't pass a step first time, a resit is straightforward and nothing to be anxious about. What matters is that you leave the day with a genuine skill, not just a laminated card.